Overview[]
The way we are displaying any HUD extension is via a Cinematic Title. This means we're making any new HUD piece into a font character. Each color or transparency difference will need to be its own character, and each meter will need to have a character for each meter value you're willing to display. That being said, this is best for simple data, simple backpack icons, or other various icons. Now, you're probably freaking out right now about artistic talents, software, etc. This tutorial will make it easy and free to do.
Before you continue, this Tutorial will expect you have OSHEK Installer, although if you're using it for Singleplayer, you are not required to compile it as an OS Map.
If you do not currently possess a means to create your own font, please download Inkscape.
Inkscape is a open source vector based image editor; SVG (Scalable Vector Graphics) can store font's, hence we will create our font as a SVG, then make use of free online font conversion services to make it into a TTF (True Type Font) which can be used freely with windows.
Creating a Font from existing Images with Inkscape[]
[Obviously, if you have your own means of creating a font, please skip past this portion]

If you have experience with vector based software, feel free to draw your item, however if you are converting something like a weapon icon into a font, or have a high resolution image that you want converted, first ensure they have contrasting colors and are a high enough resolution that the image can auto convert with minimal issues; If you are doing a weapon from a 3dsmax render, set the material to white with max illumination, then render against the default black background. For the render size, just toss some 0's in to make sure all details is accurately caught.

If you have not already, open Inkscape, create a new Document. For our size, we'll work with 1000x1000; File > Document Properties.
You can now either drag your image into Inkscape, or File > Import. Pick embed, and hit ok. Clicking on the image will switch between available options for scale and rotation; you may do that at this point if you so choose. After selecting the imported image, in the menu bar, Path > Trace Bitmap.

Select any options you feel appropriate, such as Remove background and/or invert. The other settings are for how sharp the edges are, and contrast. Adjust to your liking.


If any undesirable pieces exist, select them and delete them; CTRL+A (Select All) helps you keep track of how many items currently exist, as some may be white against the white background. After its cleaned up, select your desired object, in the Menu, Object > Ungroup, followed by Path > Union. This makes sure it is a correct vector, rather than just a collection of objects.
Repeat the steps for as many characters you need in your font. You may do it as separate SVG files, or a single SVG; at this point, merge them all into a single SVG if they are not. Dragging and dropping still works.
Scale them reasonably compared to the work area (that small box that you are probably outside). Holding CTRL while scaling will make it scale evenly. Next, we are going to want to open the Align and Distribution tool; it's part of the tool bar, the one that looks like a sideways bar graph.
Next, menu, Text > SVG Font Editor. Click NEW on the lower left corner on the Font Editor sidebar.


You can name it if you choose (click the 'font1' to rename, and type in the family name text box to change that), but now move over to the Glyphs tab. In the lower region (beside the NEW button), you will see Add Glyph; add however many characters you will use. The Glyph name is more of for your reference, you can change it the same way as the font1 if you so choose. Next, click the empty column next to the Glyph name, the Matching String. Add whatever character you are associating with this character.


At this point, look down to the align and distribute window. Select each character, hit the centering options (Middle buttons that look like centering; if you cannot discern, hover your mouse over for description). Now, with the image selected, in your SVG Font Editor, select the Glyph from the list, and click 'Get curves from selection'. Congratulations, in the preview window, you can begin typing with your font. Feel free to have the character wider than the character slot, however be aware of overlapping if you write sentences with it, however for our use, its fine. Do be aware, however, that halo DOES have minor issues when a character is overall too big; Having a plasma pistol that goes over in all directions will be a mess in-game.
Drag the currently centered character away, and repeat for the rest of the characters. When complete, save the SVG file.


Choose either http://onlinefontconverter.com/ or http://www.freefontconverter.com/ (Sometimes they freeze during conversion, and you'll need to use the other) Follow their steps (literally, choose the file, and output) to create a TTF (True Type Font). Download the TTF and install the font to your PC.
Setting up HUD Extension[]
Open a CMD window, in your Halo CE Directory.
tool windows-font
A font selector window will show up, where you select your newly created font file, and desired size. Somewhere around 22 tends to do fairly well, however it is up to you and how you are using it to select the appropriate size. You can repeat this step as often as you want until you have the desired resolution. The font will be outputted as newfont.font in the root of your tag directory. Move and rename it however you choose.


Create a duplicate of <HaloCE>\tags\ui\large_ui.font, and open the copy in guerilla. You will notice there is tag slots, Bold, Italic, Condense, Underline. You can reference 4 different child fonts from here. Pick bold, and reference the new font tool created for you. If you haven't moved it yet, it's still newfont.font directly in your tag folder.


Save this file, and open your hud_globals. The default hud_globals is located at <HaloCE>\tags\ui\hud\default.hud_globals; if you are using a custom hud_globals, edit that instead. Change the reference of ui\large_ui to your edited copy, with the child fonts. Save, and create a unicode string list. If you do not know how to make a string list, use SteelixB's String List Editor available at http://hce.halomaps.org/index.cfm?fid=1049 . Create a string for each item you are showing on screen; If your icon is capital A, add a A line. We are now moving onto sapien. You are required to use OS_Sapien purely because of a missing field in regular sapien; you can still compile your map as .map, with non-OS users using it.
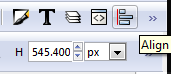
Hierarchy View, Mission. In the properties window, scroll down, In-game Help Text. Reference your Unicode String List here. Next, Game Data, Chapter Title; create a chapter title for each item in the string list. If you don't know how to set one up, reference the following image.


to reference each line of the Unicode string list, set the String Index slot in the chapter title, starting from 0 as the first string. You will see the chapter title in the game view window; use this to help yourself to align it correctly to where ever you desire it to show up. I personally recommend you set your up time to 0.2, and fade as both 0.01; my script example will have the numbers for those settings. Make sure your Text Style is set to which ever field you placed your font in; If it was bold, select bold. You should see your icon in the game view window.To display the HUD Extension in-game, you simple need a script to call the required object when its needed. Since most things I've stated are under the assumption you're displaying back weapons, that's what this example script will be. (script static unit p0 (unit (list_get (players) 0)))
(script continuous backpack

  (cond

    ((and (unit_has_weapon (p0) "weapons\assault rifle\assault rifle") (not (unit_has_weapon_readied (p0) "weapons\assault rifle\assault rifle"))) (cinematic_set_title ar))

    ((and (unit_has_weapon (p0) "weapons\pistol\pistol") (not (unit_has_weapon_readied (p0) "weapons\pistol\pistol ))) (cinematic_set_title hp))

    ((and (unit_has_weapon (p0) "weapons\plasma rifle\plasma rifle" ) (not (unit_has_weapon_readied (p0) "weapons\plasma rifle\plasma rifle" ))) (cinematic_set_title pr))

    ((and (unit_has_weapon (p0) "weapons\plasma pistol\plasma pistol" ) (not (unit_has_weapon_readied (p0) "weapons\plasma pistol\plasma pistol" ))) (cinematic_set_title pp))

    ((and (unit_has_weapon (p0) "weapons\shotgun\shotgun" ) (not (unit_has_weapon_readied (p0) "weapons\shotgun\shotgun" ))) (cinematic_set_title sg))

    ((and (unit_has_weapon (p0) "weapons\sniper rifle\sniper rifle" ) (not (unit_has_weapon_readied (p0) "weapons\sniper rifle\sniper rifle" ))) (cinematic_set_title sr))

    ((and (unit_has_weapon (p0) "weapons\flamethrower\flamethrower" ) (not (unit_has_weapon_readied (p0) "weapons\flamethrower\flamethrower" ))) (cinematic_set_title ft))

    ((and (unit_has_weapon (p0) "weapons\rocket launcher\rocket launcher" ) (not (unit_has_weapon_readied (p0) "weapons\rocket launcher\rocket launcher" ))) (cinematic_set_title rl))

    ((and (unit_has_weapon (p0) "weapons\needler\mp_needler" ) (not (unit_has_weapon_readied (p0) "weapons\needler\mp_needler" ))) (cinematic_set_title ne))

    ((and (unit_has_weapon (p0) "weapons\plasma_cannon\plasma_cannon" ) (not (unit_has_weapon_readied (p0) "weapons\plasma_cannon\plasma_cannon" ))) (cinematic_set_title pc))

  )

  (sleep 5)

)
This script will redraw which ever weapon you have in your possession, yet not in your hands, every 1/6th of a second. At this moment, the script will still display while you are driving a vehicle, and during cinematics. There is multiple ways you can go about this. For the cinematics, merely have a boolean global variable, which you toggle during cinematics, and place an IF at the top of the script that checks whether its during a cinematic. For the vehicles, you can count the number of weapons that are, or are not readied (held in your hands). If you're creating a MP OS map, you would want to refer to the local player, (script static unit loc_plyr (unit (player_data_get_object (player_local_get) slave_unit)))


